We Garage Door
Repair • Install • Same-Day
(888) 259-9830
Same-Day Garage Door Repair

Your Local Garage Door Repair Company

Broken spring, stuck door, or an opener that quit? Our local garage door techs fix it today — with a free estimate before any work begins.

Call (888) 259-9830 See reviews Fastest way in is a call — or send the form and we call you back.
100+ 5-Star Reviews Licensed & Insured 10+ Years Experience Same-Day Service Free Estimates Local Garage Door Pros

Your information is kept private and used only for your garage door service request.

Thanks — your request is ready to send as a text to our dispatch. If nothing opened, just call us at (888) 259-9830 and we’ll take it from there.

What We Do

Garage Door Services

From a snapped spring at 7 AM to a brand-new door by the weekend — one local team handles every garage door job. Residential service only — no commercial or roll-up doors.

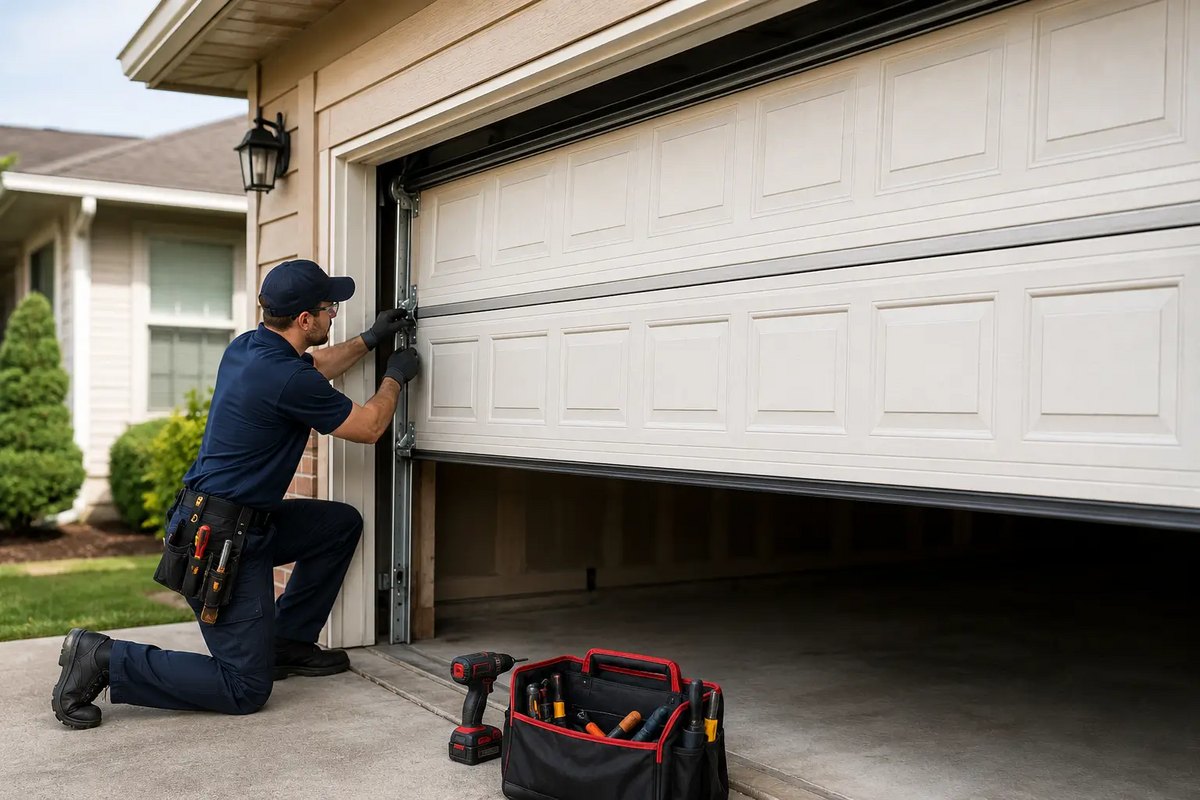
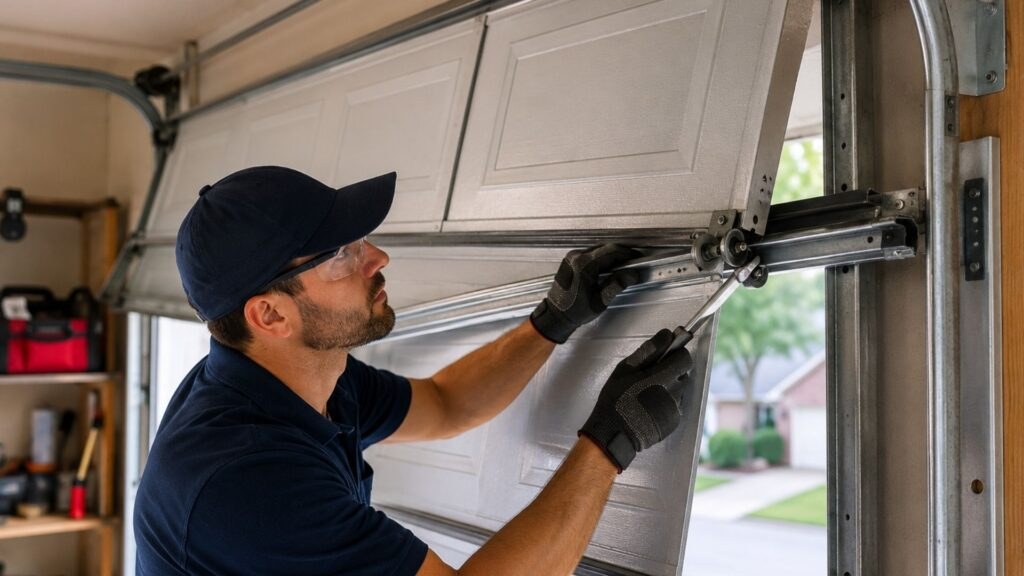
Technician repairing a garage door, working on the track and roller at the side of the door

Garage Door Repair

Noisy, crooked, or refusing to budge — we find the fault, explain it plainly, and repair it on the spot with quality parts.

Get a free estimate →
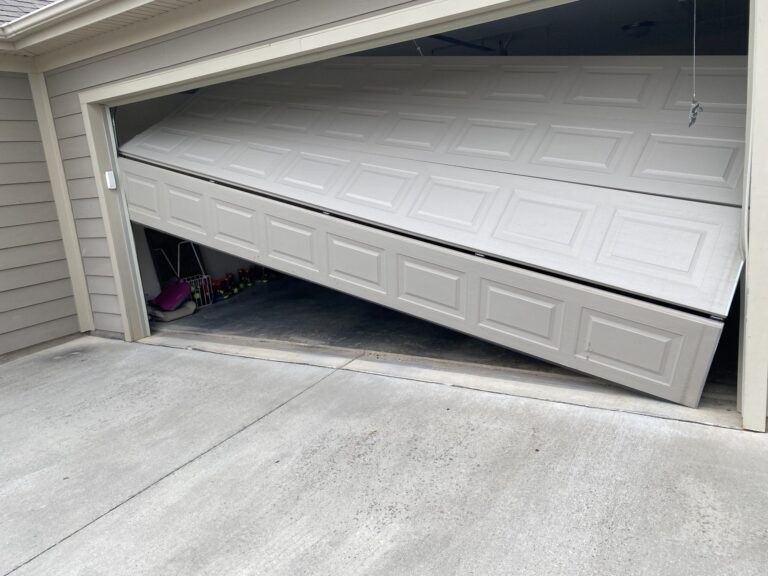
A garage door that has come down crooked and jammed — the kind of failure emergency repair is called for

Emergency Garage Door Repair

Door stuck open, off its tracks, or a car trapped inside? Call now — emergency crews are on call for urgent same-day repairs.

Get a free estimate →
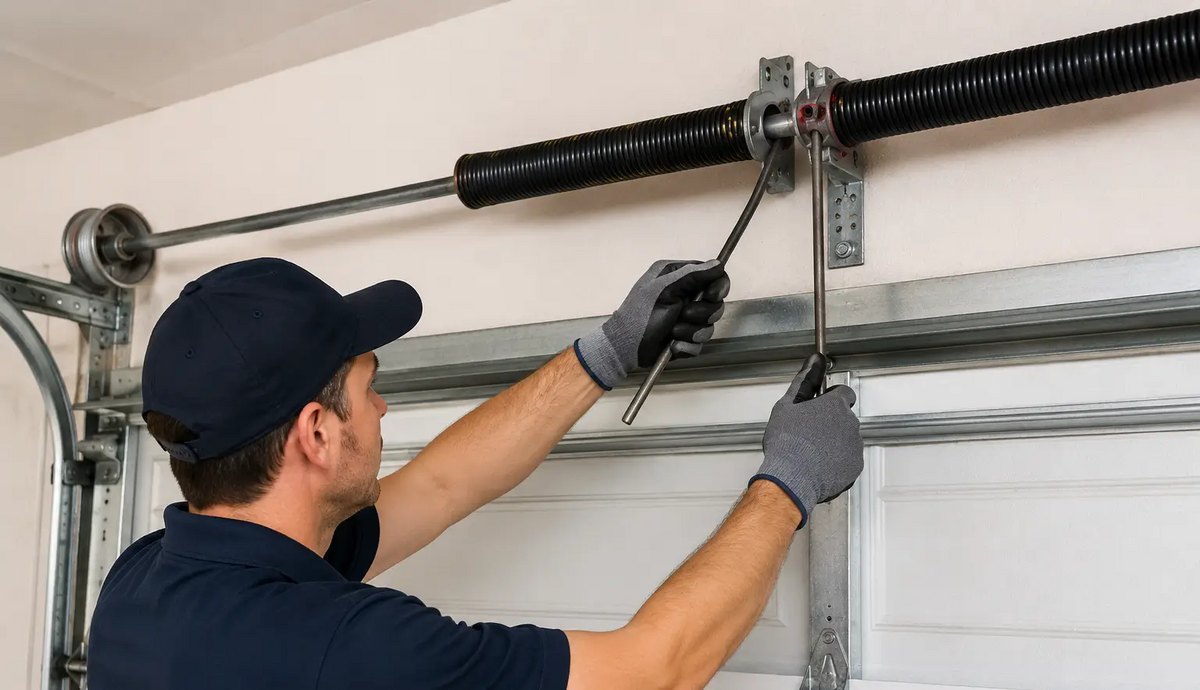
Technician replacing a garage door torsion spring, winding it with winding bars on the spring shaft

Garage Door Spring Replacement

A broken torsion or extension spring makes the door dead weight. We replace springs in matched, correctly rated pairs — same day.

Get a free estimate →
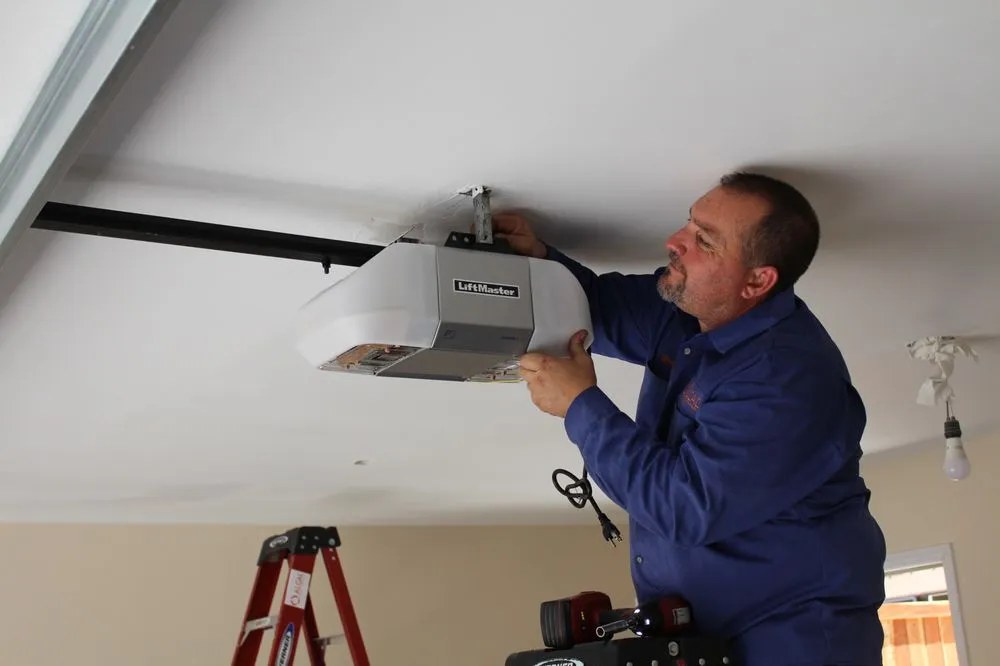
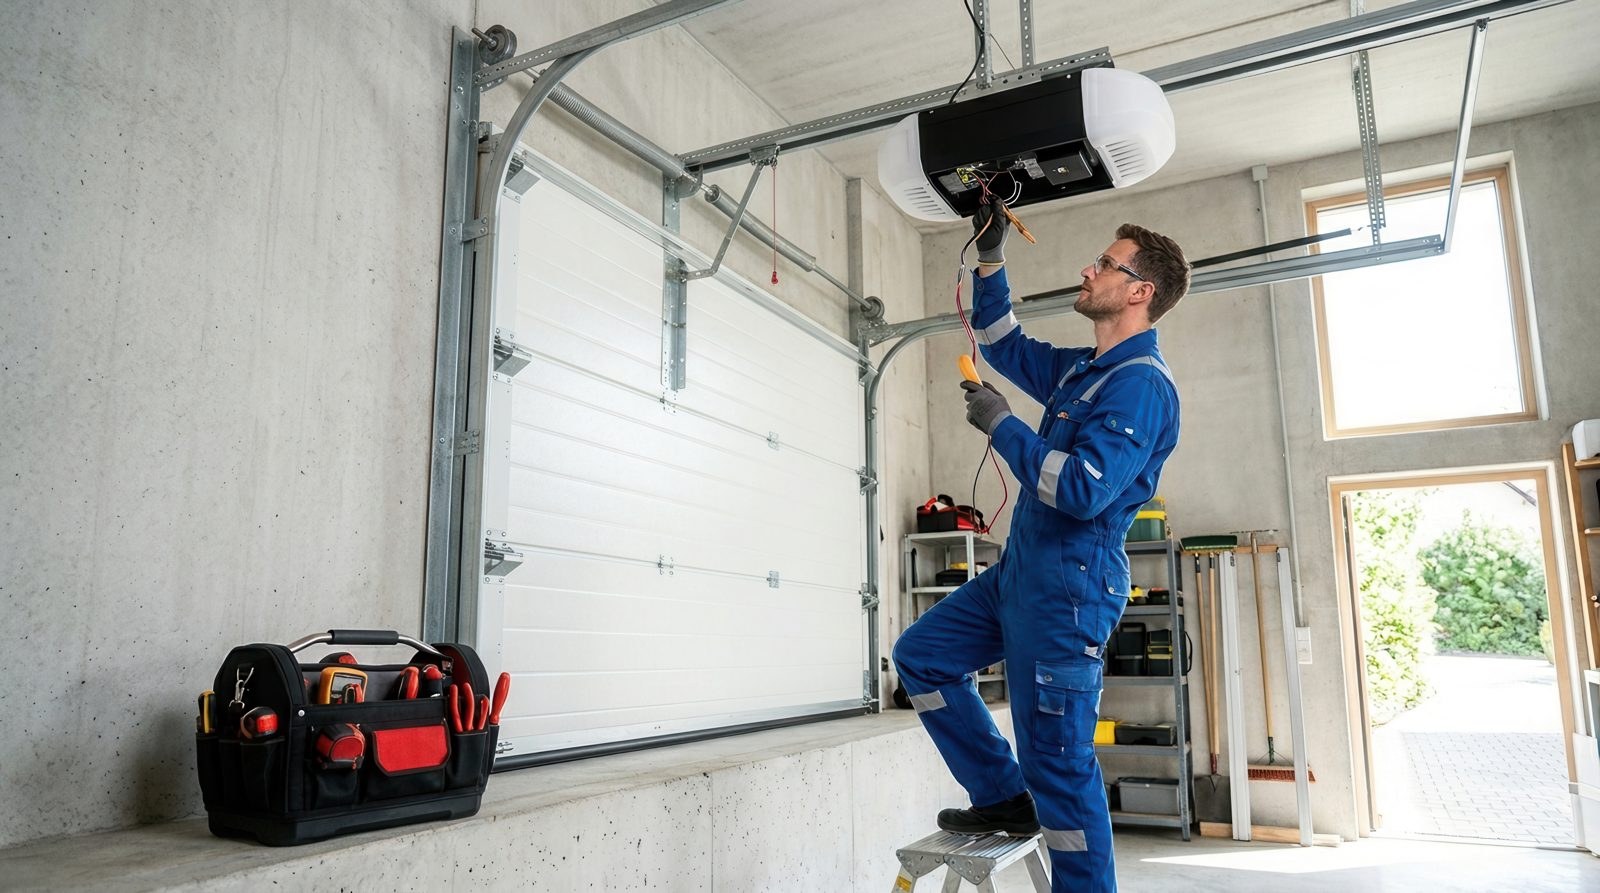
Technician installing a brand-new ceiling-mounted garage door opener

Garage Door Opener Replacement

Old opener worn out, noisy, or dead for good? We swap it for a new, quiet, modern opener — installed, programmed, and safety-tested the same day.

Get a free estimate →
Technician realigning a garage door that came off its track, resetting the roller into the track

Garage Door Off-Track Repair

A door off its tracks is unsafe to force. We realign the door, reset every roller, and check cables and tracks before it runs again.

Get a free estimate →
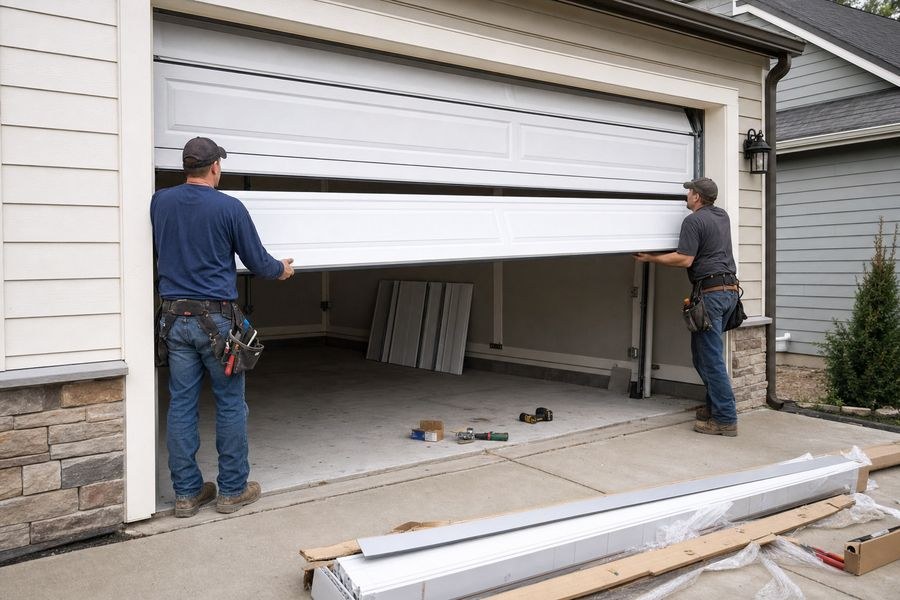
Two installers fitting a new garage door panel into place during an installation

Garage Door Installation

New doors fitted right: measured, installed, balanced, and tested with the opener set up and your old door hauled away.

Get a free estimate →

All Garage Door Services

    Technician lubricating a garage door hinge and roller by hand during a tune-up, checklist beside the work
    Why Choose Us

    The Garage Door Team Neighbors Call First

    We show up on time, explain the problem in plain words, give you a free estimate before any work starts, and stand behind every repair.

    • Garage Door Repair & Installation
    • Same-Day Service
    • 5-Star Rated — 100+ Reviews
    • Licensed & Insured
    • 10+ Years Experience
    See Us Work

    Real Repairs, Start to Finish

    No stock footage — this is our crew on a real job: the diagnosis, the fix, and the door running smooth again.

    Reviews

    Homeowners Rate Us 5 Stars

    A few of the 100+ five-star reviews our garage door crews have earned across Google, Yelp, Thumbtack, and Yellow Pages.

    GGoogle
    ★★★★★

    “Spring snapped at 6 AM and my car was stuck inside. They answered right away, had a tech out that morning, and the door runs quieter than it has in years.”

    Marcus Delgado — Houston, TX
    GGoogle
    ★★★★★

    “Honest and fast. The tech showed me exactly what failed on the opener, gave a free estimate first, and only replaced what was actually broken.”

    Sarah Whitfield — Charlotte, NC
    YYelp
    ★★★★★

    “Our door came off the track on a Sunday evening. One call and it was fixed the same day. Professional, tidy, and the door is perfectly balanced now.”

    James O’Connell — Denver, CO
    YYelp
    ★★★★★

    “New door installed and it completely changed the front of our house. The crew measured twice, cleaned up everything, and set up both remotes.”

    Priya Raman — Phoenix, AZ
    TThumbtack
    ★★★★★

    “Booked in the morning, repaired by lunch. Frayed cable replaced, rollers checked, full safety test done. Exactly how a service call should go.”

    Robert Kessler — Columbus, OH
    TThumbtack
    ★★★★★

    “The opener died during a storm and the door wouldn’t budge. Emergency repair the same evening — friendly tech, clear estimate, zero surprises.”

    Angela Torres — Tampa, FL
    YPYellow Pages
    ★★★★★

    “Years of squeaks gone after one tune-up. They lubricated everything, tightened the hardware, and adjusted the springs. Wish I’d called sooner.”

    David Lindgren — Minneapolis, MN
    YPYellow Pages
    ★★★★★

    “Keypad installed and both cars programmed in one visit. The tech walked me through everything before he left. Great local company.”

    Karen Doyle — Las Vegas, NV
    From the Blog Garage Door Repair Near Me: 7 Things to Check First Read all 5 garage door guides →
    Service Areas

    Garage Door Service in All 50 States

    Wherever you are, a local We Garage Door tech is nearby. Pick your state to find garage door repair and installation in your city.

    About Us

    Garage Door People. Not Salespeople.

    We Garage Door started with one truck, one ladder, and a simple rule: fix it right, explain it plainly, and charge a fair price agreed before the work starts. More than a decade later, that rule still runs every job we do.

    Your garage door is the biggest moving part of your home — and for most families it’s the front door you actually use, several times a day. When it breaks, it’s never at a good time: a car trapped before work, a door hanging crooked at midnight, a spring that lets go with a bang.

    That’s why we built We Garage Door around same-day service. Our technicians carry the springs, cables, rollers, openers, and hardware for the most common repairs on the truck, so most jobs are finished in a single visit — no waiting days for parts, no door left hanging open overnight.

    Every tech on our team is trained, background-checked, and works to the same standard: diagnose first, show you what failed, give you a free estimate, and only then pick up a tool. If a repair doesn’t make sense, we’ll tell you — and if a small fix is all you need, that’s all we’ll sell you.

    Today we serve homeowners in all 50 states and the District of Columbia, but every job is still handled by a local crew that knows your neighborhood — and answers to the same rule we started with.

    Two newly installed garage doors with window panels, photographed on a real job
    How a Job Runs

    From Your Call to a Finished Garage Door

    1

    You Call, We Listen

    Tell us what the door is doing. Our dispatchers ask the right questions and book a same-day window that fits your schedule.

    2

    Diagnosis & Free Estimate

    Your tech inspects the door, springs, cables, tracks, and opener, shows you exactly what failed, and gives a free estimate — before any work begins.

    3

    The Repair or Install

    Approve the estimate and we get to work, usually on the spot. Quality parts, correct spring ratings, and tidy work from start to finish.

    4

    Tested & Walked Through

    We balance the door, test the safety sensors and auto-reverse, program your remotes, and walk you through everything before we leave.

    Why Homeowners Trust Us

    The We Garage Door Standard

    10+ Years Experience

    Over a decade of garage door repair and installation — thousands of doors fixed, replaced, and running like new.

    100+ 5-Star Reviews

    Homeowners rate us five stars across Google, Yelp, Thumbtack, and Yellow Pages — and we work to earn the next one.

    Licensed & Insured

    Fully licensed and insured on every job, with trained technicians and quality parts we stand behind.

    Same-Day Service

    Call in the morning and most repairs are finished the same day — trucks stocked with the parts your door needs.

    Free Estimates

    You approve the work before it starts. Honest diagnosis, a free estimate, and no obligation to go ahead.

    Local Techs, Nationwide

    Local crews in every state who know your area — backed by one company standard for quality and care.

    We Work Where You Live

    We Garage Door serves all 50 states and the District of Columbia, with local technicians in cities and towns across the country — same-day in most areas, every day, 8 AM to 8 PM.

    See Our Service Areas
    The Blog

    Garage Door Guides & Advice

    Straight answers from the We Garage Door technicians — what that noise means, when a repair is safe to try yourself, and when it’s time to call us in.

    ← All garage door guides

    Garage Door Repair Near Me: 7 Things to Check When Your Door Won’t Open

    A We Garage Door technician diagnosing why a residential garage door will not open

    It’s the call our dispatchers at We Garage Door get more than any other: you pressed the remote, the door shuddered — or did nothing at all — and now the car is trapped and the morning is sideways. Before you assume the worst — or reach for your phone to search for garage door repair near me — run through these seven checks. A good share of the “dead door” calls we take turn out to be one of these, fixed in minutes with no tools at all.

    The Short Answer

    If your garage door won’t open, check the three causes we see most, in this order: lost power, a tripped or blocked safety sensor, or a snapped spring. Look at the outlet and breaker first, then the photo-eye sensors, then the spring above the door. No power or a blinking sensor you can often fix yourself; a visible gap in the spring means stop — search garage door repair near me and call a pro.

    1. Check the power first

    Look at the opener unit on the ceiling. If its light doesn’t come on when you press the wall button, it may have been unplugged — it happens more than you’d think after someone borrows the outlet. Next, check the breaker panel, and then the GFCI outlet in the garage: after a storm, a tripped GFCI silently cuts power to everything on that circuit, openers included. Reset it and try again.

    2. Rule out the remote and the wall console

    If the wall button works but the remote doesn’t, the remote battery is the usual suspect — swap it before anything else. If neither works, check the wall console for a lock or “vacation” mode: one bump of that switch disables every remote while leaving the door looking perfectly healthy. Turn it off and test again.

    3. Look at the safety sensors

    The two photo-eye sensors near the floor, on either side of the door, stop the opener if their beam is broken. If one light is blinking or out, the beam is misaligned, blocked by a broom or a storage bin, or the lenses are dirty. Wipe both lenses with a soft cloth, nudge the blinking one until both lights burn steady, and try the door again. If the lights won’t stay aligned no matter how you aim them, the sensors themselves may be failing — that’s part of what a garage door safety inspection covers.

    Close view of a garage door safety sensor being aligned during a We Garage Door service visit
    The photo-eye sensors at the base of the tracks — one blinking light here means the opener won’t run the door at all.

    4. Look up at the spring

    Stand back and look at the spring on the shaft above the door. A healthy spring is one continuous coil. If you can see a visible gap in the coil, the spring has snapped — and that’s the end of the checklist. A broken spring is never a DIY repair: the door’s weight is no longer counterbalanced, and the opener cannot lift it safely. Skip to the last section of this article.

    5. Check the red emergency cord

    If the opener runs but the door doesn’t move, the trolley may be disengaged — someone pulled the red cord, or it snagged on a ladder or a roof rack. With the door fully closed, pull the cord toward the opener until you hear and feel the trolley click back in, then run the opener once to re-engage it fully.

    6. Check the manual lock

    Many doors have a slide-bar lock in the handle. If it’s engaged, the opener will strain against a locked door — which can damage the top panel if it keeps trying. Slide the lock open, inspect the top panel for a bent bracket if the opener ran hard against it, and test again.

    7. Look for a blocked track or frozen seal

    Walk both tracks top to bottom. A shovel handle, a bin, or a chunk of ice in the track is enough to stop a door. In cold climates, also check the bottom seal: a door can freeze to the concrete overnight, and a gentle pour of warm water along the seal frees it without tearing the rubber.

    Mistakes that turn a stuck door into a bigger repair

    Every week our techs finish jobs that started as a simple stuck door and got worse before we arrived. The common threads:

    • Running the opener over and over. If the door doesn’t move on the second try, it won’t on the twelfth — but the motor and the top panel pay for every attempt.
    • Pulling the red cord with the door open. If a spring is broken, nothing is holding that door up but the opener. Disconnect it, and the door can free-fall.
    • Forcing the door up by hand and propping it. A door resting on a broom handle or a ladder is a door waiting to drop. If it won’t stay up on its own, leave it down.
    • Spraying lubricant into the tracks. Tracks should be clean and dry — grease in the track collects grit and makes the rollers drag. Lubricant belongs on rollers, hinges, and springs, not the track itself.
    • Yanking a “bent” sensor bracket straight. The bracket bends back gently by hand; the sensor wiring doesn’t survive being pulled.
    From the We Garage Door Truck

    Never force a door that won’t move, and never keep cycling the opener hoping it will “push through.” A standard two-car door weighs 150–300 pounds — the opener is built to guide that weight, not dead-lift it. Forcing it burns out motors and bends panels, turning one repair into two.

    When it’s time to call a garage door repair pro near you

    If you found a broken spring, a frayed or snapped cable, a door hanging crooked, or you ran all seven checks and the door still won’t move — that’s our job, and it’s usually a same-day one. A We Garage Door tech will diagnose the fault, show you exactly what failed, and give you a free estimate before any work begins. Most mornings that start with a trapped car end with the door running before lunch. You can call, or send the details through the quote form at the top of this site and dispatch will call you back.

    Quick answers

    Can I open the door by hand if the opener fails?

    If the springs are intact, yes: pull the red cord with the door closed, lift steadily, and it should rise and hold its position. If it feels extremely heavy or won’t stay up, a spring is broken — stop there, and read our guide on what to do about a broken torsion spring.

    The door opens a few inches, then stops. What is that?

    Most often a broken spring: the opener can start the lift but can’t carry the full weight once the door’s balance point passes. It can also be the door binding in the track. Either way, stop cycling the opener and have it looked at — this is exactly what a garage door repair visit diagnoses first.

    My remote works only sometimes. Is the opener dying?

    Not necessarily — it could be a weak battery, an LED bulb in the opener interfering with the radio signal, or a receiver starting to fail. Our guide to how long a garage door opener should last walks through the warning signs that separate a small fix from a replacement.

    The door is stuck open and won’t close. What should I do?

    Check the sensors and the tracks for anything blocking the door’s path, and clear the doorway. If the door still won’t close — or it’s hanging unevenly — don’t force it down and don’t stand underneath it. A door stuck open is a security problem as well as a repair, so treat it as a same-day call rather than a weekend project.

    How quickly can a repair tech get out?

    In most areas, the same day you call — our crews run every day, 8 AM to 8 PM, and a trapped car or a door that won’t close goes to the front of the dispatch list. When you call, tell dispatch exactly what the door is doing; the seven checks above are the same questions they’ll ask, and your answers help the tech arrive with the right parts on the truck.

    Door still stuck? We’ll take it from here.

    Same-day garage door repair by local We Garage Door techs — free estimate, no obligation, and most repairs finished in a single visit.

    Call (888) 259-9830
    ← All garage door guides

    Garage Door Spring Replacement: Signs Your Torsion Spring Broke, and What to Do Next

    Technician winding a new torsion spring onto the shaft above a garage door

    Homeowners describe it the same way, every time: a bang like a gunshot, or a car backfiring inside the garage — and then a door that won’t open. At We Garage Door, that bang is the single most common repair call we run. It’s the sound of a torsion spring letting go — and a broken spring can’t be patched, only replaced. Here’s what a garage door spring replacement involves, what to do, and what not to do.

    The Short Answer

    If you heard a loud bang and the door now rises a few inches then stops, the torsion spring has snapped. Don’t force the door or keep running the opener — the door is 150–300 pounds of dead weight without the spring. A garage door spring replacement is a same-day pro job: both springs are swapped for a matched pair rated to your door’s exact weight.

    What the spring actually does

    Your garage door weighs somewhere between 150 and 300 pounds. The opener does not lift that weight — the springs do. A torsion spring, mounted on the shaft above the door, winds tighter as the door closes and uses that stored energy to counterbalance the door’s weight as it opens. The opener is really just guiding a door that the springs have made nearly weightless. When the spring snaps, the full weight comes back — instantly.

    The signs a spring has broken

    • The bang. A loud, sharp crack from the garage, often at night as the metal cools and contracts.
    • A visible gap. Look at the spring above the door: a broken one shows a clear separation of a few inches in the coil.
    • The door rises a few inches, then stops — or slams back down. That’s the opener trying, and failing, to lift dead weight.
    • The door feels impossibly heavy if you disconnect the opener and try to lift it by hand.
    • The opener hums or strains but the door barely moves.

    Why springs break

    Springs are rated in cycles — one open plus one close. Standard springs are built for roughly 10,000 cycles, which at four trips a day works out to about seven years. Rust, temperature swings, and a door that’s slightly out of balance all shorten that life. A spring doesn’t usually fail because of one bad day; it fails because it has lifted your door ten thousand times.

    A freshly installed torsion spring on the shaft of a residential garage door
    A new torsion spring, mounted and tensioned on the shaft. The correct spring is matched to your door’s exact weight — not guessed.

    Why this is not a DIY job

    A wound torsion spring holds enough energy to lift a 300-pound door — and it releases that energy all at once if a winding bar slips. Spring work is the one garage door repair that sends people to the emergency room every year. Our technicians release and set tension with the correct winding bars, secured stands, and both hands on the job — it’s routine for us precisely because we have the tools and the training. Please leave this one to a pro.

    Mistakes we see after a spring breaks

    • Replacing only the broken spring. The surviving spring carries the same cycle count and usually follows within months — two service calls and two trapped-car mornings instead of one.
    • Buying springs by color code alone. The paint marks on a spring’s end are a starting hint, not a specification. Wire size, coil diameter, length, and the door’s actual weight all have to match.
    • Propping the door open and driving under it. With a spring gone, the door is full dead weight resting on whatever you wedged under it. Props slip.
    • Letting the opener “help” lift it. The opener will strain, overheat, and can tear its bracket clean out of the door’s top panel — turning a spring job into a spring-and-panel job.

    Why we replace springs in matched pairs

    Most two-car doors have two springs, installed the same day and cycled the same number of times. When one snaps, the other is at the end of its life too — replacing only the broken one usually means a second service call within months. We replace both with a matched, correctly rated pair, so the door balances evenly and the new springs age together.

    What a garage door spring replacement visit looks like

    Your tech measures the old spring’s wire size, coil diameter, and length, weighs the door, and matches the replacement to the door’s exact weight — a spring that’s too weak or too strong will strain the opener and wear out early. Then both springs are fitted, tension is set, and the job finishes with a balance test (the door should hold its position halfway up, disconnected from the opener) and a full safety check. Springs ride on our trucks, so this is normally a single same-day visit — with a free estimate before we touch a tool.

    How the replacement runs, step by step

    1. Secure the door. The door is closed, clamped in the track, and disconnected from the opener, so nothing can move unexpectedly while tension is handled.
    2. Release the remaining tension. If the second spring is still wound, its tension is unwound in a controlled way with winding bars — never by loosening hardware and hoping for the best.
    3. Remove and measure. The broken spring comes off the shaft and is measured — wire size, inside diameter, and length — and the door is weighed, so the replacements are rated exactly right for it.
    4. Fit the matched pair. Both new springs go onto the shaft, and the center bearing, cable drums, and cables are inspected while everything is apart.
    5. Wind and set the tension. Each spring is wound to the correct number of turns for the door’s height and weight — this is the step that decides how the door feels for the next decade.
    6. Balance and safety test. The door has to hold halfway on its own, run smoothly through full cycles, and pass the auto-reverse and photo-eye tests before we pack up.

    That whole sequence is our garage door spring replacement service — one visit, no parts run, door balanced before we leave.

    From the We Garage Door Truck

    One safe check you can do: with the door fully closed, pull the red release cord and try to lift the door by hand. A balanced door lifts with modest effort and stays where you leave it. If it feels like lifting the heavy end of a piano, stop — a spring is gone, and forcing it only risks the opener and the panels.

    Quick answers

    How long does a spring replacement take?

    Most pairs are fitted, tensioned, and tested in about an hour once the tech is set up — the springs ride on the truck, so there’s no parts run in the middle of your day. Heavier doors, or extra wear found during the inspection like frayed cables, can add a little time.

    Can I get my car out before you arrive?

    We’d rather you didn’t. With a spring gone, the door is 150–300 pounds of dead weight and it will not stay up on its own. If a car is genuinely trapped and waiting isn’t possible, the only version we’d describe is two adults lifting evenly together — never one person, never anyone standing in the doorway — holding the door the entire time. The safer answer is that broken-spring calls are among the first our dispatch sends out.

    Will any spring from the hardware store fit my door?

    Almost never correctly. A slightly under-rated spring wears out fast and strains the opener; an over-rated one makes the door fly up and slam. Matching a spring is a measurement job — it’s why our techs weigh the door instead of guessing. And if you’re not sure which spring system your garage even has, start with torsion vs. extension springs, explained.

    Should both springs be replaced if only one broke?

    Yes — on a two-spring door, both springs were installed the same day and have run the same number of cycles. Replacing only the broken one leaves a worn spring beside a new one, and the survivor usually follows within months. A matched pair balances the door evenly and turns two emergency calls into one visit.

    How long should the new springs last?

    Standard springs are rated around 10,000 cycles — one open plus one close — which works out to roughly seven years in a household making about four trips a day. Higher-cycle springs are available and worth asking about if your garage is the main way in and out of the house; your tech can quote both under the same free estimate.

    Heard the bang? Don’t force the door.

    We Garage Door replaces broken springs the same day, in matched pairs rated for your door — free estimate first, every time. Prefer writing? Send the quote form and dispatch will call you back.

    Call (888) 259-9830
    ← All garage door guides

    Garage Door Opener Replacement: How Long Should an Opener Last?

    Technician installing a new ceiling-mounted garage door opener

    The garage door opener is the appliance nobody thinks about — until the morning it groans, flashes its light, and gives up with the car inside. At We Garage Door we handle garage door opener replacement and repair every day, and the first question is always the same: is this one just old? Here’s the honest answer, by the numbers and by the sounds your opener is making.

    The Short Answer

    A residential garage door opener typically lasts 10–15 years. Grinding, straining, slow travel, and remotes that only work up close are the usual end-of-life signs — but a worn gear, logic board, or sensor is often an honest repair, not a replacement. Age alone settles it only for pre-1993 units, which predate modern safety sensors and should be replaced, not repaired.

    The honest answer: 10 to 15 years

    A typical residential opener lasts 10–15 years. Where yours lands in that range depends on how many times a day it cycles, whether the door is properly balanced (an unbalanced door makes the motor work far harder than it should), and the climate it lives in. An opener running a balanced door four times a day can outlive a neglected one by years.

    Lifespan by opener type

    • Chain drive — the workhorse. Chains stretch and need occasional adjustment, but the drive itself is durable and commonly reaches the top of the range. The trade-off is noise.
    • Belt drive — a steel-reinforced belt runs quietly and lasts well; the belt itself can eventually stretch or snap, and it’s replaceable.
    • Screw drive — few moving parts and strong lifting power, but the screw mechanism dislikes big temperature swings and needs its specific lubricant.
    • Wall-mount (jackshaft) — mounted beside the door instead of on the ceiling; frees up overhead space and tends to run smoothly for years.

    Warning signs yours is on the way out

    Openers rarely die silently. Watch for grinding or straining sounds that weren’t there before, a door that starts and then reverses for no clear reason, noticeably slower travel, remotes that only work standing close to the door, a wall button that works only sometimes, or a unit that vibrates and shakes on its mounts. Any one of these is worth a look; two or three together usually means the end is near.

    A We Garage Door technician servicing a ceiling-mounted opener on a real job
    Diagnosing an opener on a real We Garage Door job — gears, logic board, and safety systems all get checked before we call it one way or the other.

    Mistakes that shorten an opener’s life

    • Ignoring a heavy door. The opener is the messenger, not the muscle. A door the springs no longer balance makes the motor work overtime on every single cycle.
    • Never lubricating the door. Dry hinges, rollers, and springs make the opener pull against friction it was never sized for.
    • Cranking up the force settings. Turning the force up to mask a binding door teaches the opener to push through obstructions — the exact opposite of what its safety system exists to do.
    • Skipping the monthly safety test. If the door doesn’t reverse on contact, or the photo-eyes have been taped over or bypassed, that’s not a quirk — it’s the opener telling you it can’t protect anyone.

    The 1993 line we won’t cross

    Openers manufactured before 1993 predate the modern safety standard — the photo-eye sensors and auto-reverse systems that protect kids, pets, and bumpers. When we meet one of these units, we don’t repair it; we recommend replacement, every time. It’s the rare case where age alone settles the question.

    Repair or replace? How our techs call it

    Plenty of opener failures are honest repairs: a worn drive gear, a failed logic board, dead sensors, a stretched chain. Those we fix on the spot — they’re the core of our opener repair work. Replacement makes more sense when the motor itself is burnt out, the housing or rail is damaged, parts are no longer made for the model, or the unit lacks modern safety features. When you call We Garage Door, the tech shows you what failed, gives you a free estimate, and lays out both options when both genuinely make sense — if a repair is all you need, that’s all we’ll sell you.

    What a garage door opener replacement visit includes

    A new opener from We Garage Door is installed, balanced against your door, and safety-tested the same day: rail and unit mounted, remotes and keypad programmed, photo-eyes aligned, auto-reverse tested, and your old unit hauled away. Most homeowners also notice the new one is dramatically quieter — that’s the part people mention at the door as we leave.

    An opener replacement, step by step

    1. Confirm the door itself first. Before any new opener goes in, we check the door’s balance, springs, and hardware — a new opener fitted to a bad door is a short-lived opener.
    2. Remove the old unit. Rail, motor, and wiring come down, and the old opener is hauled away at the end of the visit.
    3. Mount and wire the new opener. Header bracket, rail, motor unit, wall console, and safety sensors fitted, wired, and aligned.
    4. Set the limits and force. Travel limits and closing force are dialed in to your specific door — never left at factory defaults.
    5. Program everything. Hand remotes, vehicle buttons, and the exterior keypad, all working before we leave.
    6. Safety test, twice. Photo-eye reversal and contact reversal are tested in front of you — and we show you how to repeat the test yourself each month.

    All of that sits inside one garage door opener replacement visit, with the new unit chosen for your door’s size and weight — not just whichever model happens to be on sale.

    From the We Garage Door Truck

    The cheapest way to extend an opener’s life is a balanced door. Disconnect the opener with the door closed, lift the door by hand to halfway, and let go: it should hold position. If it slams down or shoots up, the springs need attention — and every cycle in the meantime is wearing your motor out early.

    Quick answers

    Can a new opener work with my existing door?

    Almost always, yes — openers are matched to a door’s size and weight, not its brand. The exception is a door that’s failing on its own: badly unbalanced, or running on worn springs. We check the door first, and if the door needs work, you’ll hear it from us before anyone quotes you an opener. If the door won’t open at all right now, start with our seven checks for a door that won’t open.

    Chain or belt drive — which should I choose?

    Belt, if a bedroom sits above or beside the garage: it’s dramatically quieter. Chain, if the door is heavy and the garage is detached: chains are the long-lived workhorses. Either one can be fitted during a standard opener installation visit.

    Do smart openers actually help?

    The genuinely useful parts are the phone alert when the door gets left open, and delivery access or a camera on some models. The rest is garnish. What actually matters is that the safety systems are current — photo-eyes, auto-reverse, and a battery backup if your area loses power often.

    How long does a garage door opener replacement take?

    One visit, the same day in most cases: the old unit comes down, the new one is mounted, wired, and programmed, and the safety tests are run in front of you before we leave. The only thing that stretches a visit is the door itself — if the balance or springs need attention first, the tech will show you why before anyone quotes an opener.

    My opener still works but has gotten very loud. Is it failing?

    Not always. A stretched chain, dry hinges and rollers, or loose mounting hardware can make a healthy opener sound rough — all of those are maintenance, not replacement. New grinding from inside the unit, or noise plus slower travel, points more toward a worn drive gear or a tiring motor. A diagnosis tells you which one you have; that’s what the free estimate visit is for.

    Opener groaning, stalling, or dead?

    We Garage Door repairs most openers on the spot — and replaces the ones that are truly done, installed and safety-tested the same day. Free estimate first — or send the quote form and dispatch will call you back.

    Call (888) 259-9830
    ← All garage door guides

    Garage Door Off Track Repair: Why It Happens and How Pros Fix It

    Technician resetting a roller into the track of a garage door that came off its track

    One side sits higher than the other. A roller is hanging out of the track, the door is wedged at an angle, and every press of the remote makes it groan. A garage door off its tracks looks alarming because it is — a partially supported door is a heavy object in an unstable position. At We Garage Door this is an emergency garage door off track repair call, and here’s why it happens, what to do right now, and how we put it right.

    The Short Answer

    Stop using the door. A door off its tracks is only partially supported, so don’t run the opener, don’t pull the red release cord, and keep everyone clear of the doorway. The usual causes are a car bump, a snapped lift cable, or worn rollers. A garage door off track repair means securing the door, reseating the rollers, realigning and re-anchoring the tracks, and replacing whatever wore out — a same-day emergency job.

    Why doors come off their tracks

    • A bump from a car. The classic: a slow roll into the door while it’s moving, or a tap from a bumper, is enough to pop rollers out on one side.
    • A broken or frayed lift cable. When one side’s cable fails, that side drops while the other keeps lifting — the door racks sideways and rollers leave the track.
    • Worn rollers. Rollers with cracked wheels or worn stems wobble in the track until one works its way out entirely.
    • An obstruction. Something in the track’s path — a bin, a tool, packed ice — stops one side while the other keeps moving.
    • Loose track hardware. Brackets work loose over years of vibration until the track itself shifts out of alignment.

    What to do right now

    Stop pressing the button. Every extra cycle bends panels and tears tracks further. And unlike a simple stuck door, don’t pull the red release cord on a crooked door — the opener may be the only thing holding the high side up, and disconnecting it can let the door fall. Keep people and pets well clear of the doorway, leave the door exactly as it sits, and call us. This is precisely the kind of local emergency job our crews run same-day.

    A garage door hanging crooked after coming off its track, before a We Garage Door repair
    A door off its tracks, secured before repair. Forcing a crooked door is how bent panels and torn tracks happen.

    How our techs handle garage door off track repair

    First, the door is secured and supported so it can’t move unexpectedly. Where the repair calls for it, spring tension is managed safely with the door stabilized. Then every roller is inspected and reseated — cracked or wobbling rollers are replaced, not reused. The tracks are plumbed, realigned, and re-anchored to the framing, and frayed or snapped cables are replaced in pairs so both sides lift evenly. The visit ends the way every We Garage Door job ends: a balance test and a full safety test, with the door running through several full cycles before we call it done — and a free estimate given before the work starts.

    The realignment, step by step

    1. Secure the door. It’s clamped and supported exactly where it sits — nothing moves until we say so.
    2. Inspect the whole system. Panels, hinges, rollers, cables, drums, and tracks are all checked, because a door that left its tracks usually arrives with the worn part that caused it.
    3. Reseat the rollers. The track is opened at its seam just enough to walk each roller back in — the track is never bent open by force.
    4. Plumb and anchor the tracks. Both tracks are set parallel and level, then re-anchored into solid framing.
    5. Replace what’s worn. Frayed cables are replaced in pairs, and cracked or wobbling rollers are swapped for new ones rather than reseated to fail again next month.
    6. Test the full travel. Several slow cycles, a balance check, and the safety tests. The door has to track true the whole way up and down — not just close once.

    Keeping it on track

    Most off-track events are preventable with the checks in a yearly tune-up: rollers inspected for cracks and wobble, cables checked strand by strand for fraying, track bolts tightened, and the door’s balance verified. If your door has started sounding rough on one side, or you can see a cable that looks fuzzy with broken strands, that’s the time to book — a cable replaced on a Tuesday is a door that never leaves its tracks on a Saturday.

    Warning signs before it happens

    Doors rarely jump the track without rehearsing first. Book a look when you notice the door shuddering more on one side than the other, a roller visibly wobbling in its track as it passes, gaps opening between panels on one side while it closes, or a lift cable that looks fuzzy with broken strands. Each of those is a small, scheduled repair. Ignored, they’re how doors end up hanging crooked at the worst possible hour.

    Mistakes that make an off-track door worse

    • Pushing the door back into line by hand. A sprung panel or bent hinge is usually why it left the track — leaning your weight into it just adds to the damage.
    • Running the opener to “pull it straight.” The opener pulls from the top center of the door; a crooked door binds harder the further it travels.
    • Bending the track back with pliers. A plier bend is a kink, and the roller will catch on that kink on every pass for the rest of the door’s life.
    • Ducking out under it with the car. A crooked door is only partially supported. If it lets go while the car is halfway out, both of them lose.
    From the We Garage Door Truck

    If rollers pop out more than once, something upstream is worn — usually the roller stems or the track spacing itself. Ask the tech to check both while the door is reseated; a reseat alone won’t hold if the hardware that caused it is still in place.

    Quick answers

    Can I just push the rollers back in myself?

    On a level, fully supported door with no other damage, a roller sometimes pops back in — but if anything else is wrong (a frayed cable, a bent track, a cracked roller), it will come back out under load, usually at a worse moment. And if the door is crooked or hanging, it isn’t a push-it-back situation at all: keep everyone clear and let us secure it first.

    What if a panel got bent when the door came off?

    A minor bend in a single panel can sometimes be straightened. A creased or torn panel is replaced on its own — you do not need a whole new door for one damaged section. That’s a standard panel replacement, matched to your door’s make and profile wherever the model is still made.

    Could a broken spring have caused this?

    Yes. When a spring fails, or a cable slips its drum in the aftermath, one side of the door drops and the whole door racks sideways. It’s why our realignment covers the springs and cables and not just the tracks — and why our guide to broken torsion springs is worth a read if you heard a bang before the door went crooked.

    Can I drive my car out under a crooked door?

    Please don’t. A door off its tracks is held by fewer rollers than it was designed for, and it can drop without warning. If the car is trapped, it waits — off-track calls are dispatched as emergencies precisely so you’re not choosing between your car and your safety for long.

    Is an off-track repair a same-day job?

    Yes — it’s treated as an emergency repair, and in most cases the door is secured, realigned, and running through full test cycles in a single visit. The visit runs longer only when the cause left extra damage behind, like a creased panel or a snapped cable pair, and you’ll see anything like that in the free estimate before work starts.

    Door hanging crooked? Leave it right there.

    We Garage Door realigns off-track doors the same day — secured, reseated, and safety-tested, with a free estimate before work begins. Can’t call? Send the quote form and dispatch will call you back.

    Call (888) 259-9830
    ← All garage door guides

    Torsion vs. Extension Springs: What’s the Difference?

    Close view of the spring system mounted above a garage door

    Every garage door is lifted by springs — but not the same springs. Garages run on one of two spring systems, torsion springs or extension springs, and they look nothing alike, and which one you have changes how long your springs last, how the door feels, and one safety part you should check this week. Our We Garage Door techs work on both daily; here’s the plain-English version.

    The Short Answer

    Torsion springs sit on a shaft above the door and lift by twisting; extension springs stretch along the side tracks and lift by pulling. Torsion systems run smoother, balance the door more evenly, can be rated for more cycles, and keep a broken spring contained on the shaft. Extension springs are safe only with a safety cable threaded through each one — check yours this week.

    Which system do you have?

    This takes ten seconds. Stand in the garage with the door closed and look up. If you see one or two springs wrapped around a metal shaft mounted on the wall above the door, you have a torsion system. If instead you see long springs stretched out along the horizontal tracks on each side, above the door’s travel path, you have extension springs.

    How each one lifts the door

    Torsion springs lift by twisting. As the door closes, the spring winds tighter around its shaft; as the door opens, it unwinds and that twisting force turns the shaft, winding the lift cables evenly on both sides. The energy stays contained on the shaft, and the lift is steady from bottom to top.

    Extension springs lift by stretching. As the door closes, each spring stretches out along its side track; opening the door lets the springs contract and pull the door up through cables and pulleys. Each side works somewhat independently, which is why extension doors can feel a little less even as parts age.

    Detailed view of garage door spring hardware during a We Garage Door inspection
    Spring hardware up close. Whichever system you have, the springs — not the opener — do the heavy lifting on every cycle.

    Torsion vs. extension spring lifespan and feel

    Springs are rated in cycles (one open + one close). Extension springs are typically rated around 10,000 cycles. Torsion springs start around the same figure but are available in higher-cycle ratings — 15,000, 20,000 and beyond — because the wire size and coil can be specified for the door. Torsion systems also tend to run smoother and quieter, and they balance the door more evenly across its full travel. That’s why most new installations, and most of the replacements we fit at We Garage Door, are torsion.

    The safety difference that matters

    When an extension spring snaps, it’s a stretched spring under load with nothing holding it — it can whip across the garage. That’s why every extension spring should have a safety cable threaded through its center, anchored at both ends, to contain it if it breaks. Go look at yours: if your extension springs have no cable running through them, that’s a small, inexpensive fix worth scheduling soon. A broken torsion spring, by contrast, stays on its shaft — one more reason the industry has moved toward torsion.

    Mistakes we see with both spring systems

    • Running extension springs with no safety cables. The single most common — and most fixable — hazard we find in older garages.
    • Mixing one new spring with one old one. Mismatched age means mismatched strength: the door lifts unevenly, and the new spring wears faster carrying the difference.
    • Adjusting spring tension as a DIY tune-up. Tension is set by measurement, not by feel, and both systems store dangerous energy while you work. This is never a homeowner adjustment.
    • Judging springs by looks alone. A clean, shiny spring can be sitting at cycle 9,900 of its 10,000. Stretch, sag, and the door’s balance tell the real story.

    Can you convert from extension to torsion?

    Usually, yes — most garages have the headroom above the door for a shaft and spring setup. Conversion means fitting the shaft, bearings, cable drums, and correctly rated springs, and it’s a job our local techs quote free during any spring visit. Homeowners typically convert when an extension spring fails, and they feel the difference in smoothness on the very first cycle.

    Wear signs, whichever you have

    • Stretching: extension springs that no longer return to their relaxed length have lost their lift.
    • Rust and gaps: corrosion weakens both types; a visible gap in a torsion coil means it has already snapped.
    • A door that’s getting heavier to lift by hand, or won’t hold halfway — the springs are tiring, whichever system you run.

    A safe spring health check, step by step

    All visual, all done with the door closed — you never touch the springs themselves.

    1. Look, don’t touch. Torsion system: scan the coil above the door for a gap or separated turns. Extension system: check that both springs hang at roughly the same length, and confirm a safety cable runs through the center of each one.
    2. Watch one full cycle. Run the opener and watch both corners of the door. It should travel evenly, sides rising together, with no jerking and no corner leading the other.
    3. Do the balance test. Pull the red cord with the door closed, lift the door halfway by hand, and carefully let go. It should hold position. Drifting down means tired springs; shooting upward means they’re over-tensioned.
    4. Listen. A healthy system is boring. New squeals, pops, or a boing from the spring area are the system filing a complaint.

    Anything off in those four steps earns a safety inspection — springs are judged by measurement, and catching a tired spring early beats meeting a broken one at 7 AM.

    From the We Garage Door Truck

    Take a photo of your springs today and keep it on your phone. When one breaks, that photo — and the color markings painted on the spring’s end — tells our dispatcher exactly what rating your door needs, so the tech arrives with the right spring on the truck.

    Quick answers

    Which system is better for a heavy, insulated door?

    Torsion, and it isn’t close. Heavier doors need precisely rated springs and an even lift on both sides — exactly what a shaft-mounted torsion setup delivers. It’s why heavy modern doors ship with torsion systems, and why most conversions we fit go that direction.

    How do I know my spring’s cycle rating?

    Usually, you can’t — the rating comes from the wire size, coil diameter, and spring length combined, not from a label you can read in place. Our techs measure all three and weigh the door; that combination is the rating. If your springs are original to a busy household and past seven or eight years old, plan on them being in the late innings whichever system you have.

    My extension spring broke. Should I switch to torsion now?

    It’s the natural moment to consider it: the door is already down and the labor overlaps. We’ll quote both options — a like-for-like extension pair, or the conversion — under the same free estimate, with the honest version of which we’d fit in our own garages. Either route starts with garage door spring replacement, and if the spring has already snapped, read what to do next before you touch the door.

    Which system is safer when a spring breaks?

    Torsion, by design: a broken torsion spring stays wound on its shaft above the door. An extension spring under stretch can whip when it lets go, which is exactly what the safety cable through its center is there to prevent. If your extension springs have no cables, that’s the first fix to schedule — it’s small, quick, and it closes the biggest safety gap in an older garage.

    Can I swap one spring for the other type?

    No — the two systems aren’t interchangeable parts. Each is a complete setup: shaft, bearings, and drums for torsion; side springs, cables, and pulleys for extension. Changing systems means converting the whole setup, which is a quoted job of its own — most homeowners do it when an extension spring fails and the labor already overlaps.

    Springs look tired — or one already snapped?

    We Garage Door services both systems and converts extension setups to torsion — matched to your door’s weight, with a free estimate first. Prefer writing? Send the quote form and dispatch will call you back.

    Call (888) 259-9830
    WhatsApp Us